
Recently I had the good fortune of being able to present at Wordcamp Vancouver 2015. My presentation was titled ‘Why Security Matters‘ and I mentioned website backups several times. One of the people who attended asked me a great question:
I backup my computer, and I backup the backup of my computer, but how do I backup my website?
Many clients that I work with have never backed up their website. If your website ever breaks or gets infected these backups become your best friend. I’d like to share some step-by-step instructions on how you can manually make a backup of and restore your site without using any plugins or services.
What Do I Need?
Some hosting providers perform backups for you and there are also some backup services and plugins you can purchase. For the purpose of this tutorial I am going to assume that your hosting provider does not do backups for you and we are going to use free software programs that anyone can access.
Before we begin let’s make sure you have the following software downloaded and ready to go:
This is a great open-source FTP client for accessing your site files. A simple and secure tool to manage your database.FTP credentials to your website.
These can be found in your hosting account.You’ll need a user name, password and hosting name or IP.
Get Filezilla installed on your machine (it works with Windows/Linux/Mac), download the PHP file from the Adminer website and make sure you’ve got your FTP host name, user name and password. It’s important to note that while Filezilla is an excellent cross-platform FTP client it doesn’t store your passwords securelyso be sure to disable the password save option. Yes I know, it’s irritating to have to enter your password every time but let’s not cut corners here.
Let’s Get Started
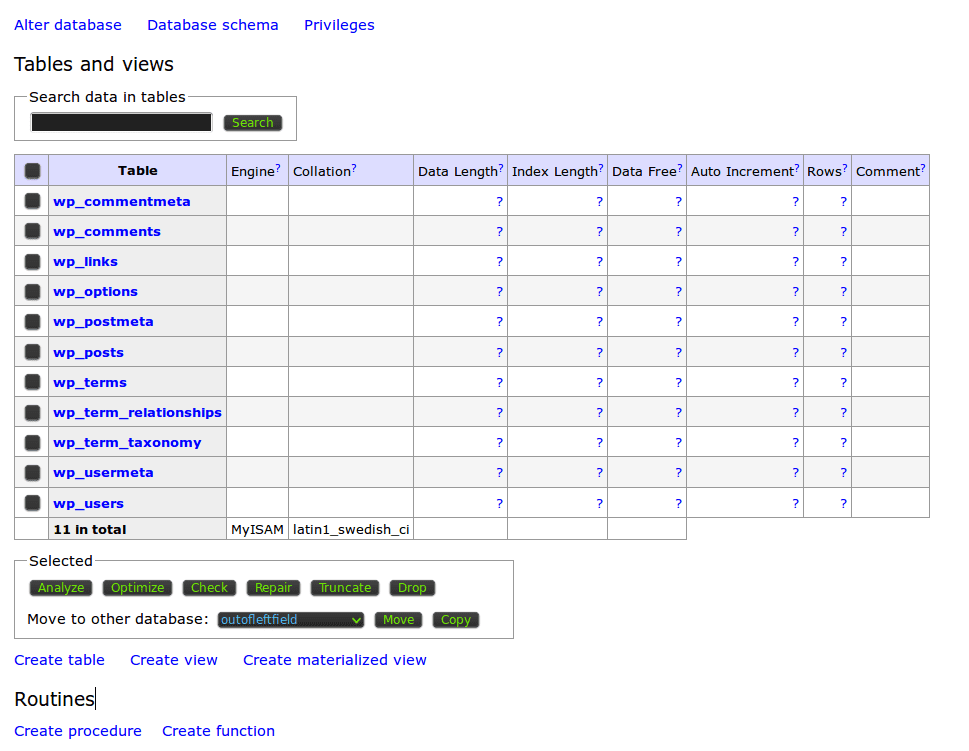
So now that we have the tools to get started let’s understand what we’re doing. Your website consists of site files and one or more databases (usually just one).
The files will include your core CMS, extensions/theme files and any photos/media you’ve uploaded to the site.
The database is where the content of your site (like blog posts) and its settings are stored (extension/theme settings and user information).
We need both to have a complete backup.
Files
So let’s get Filezilla loaded up. Here we go!
Let’s first click on the Site Manager button from the File menu. Once you have that loaded up let’s take a look at those FTP credentials that you grabbed from your hosting account and enter them in here:
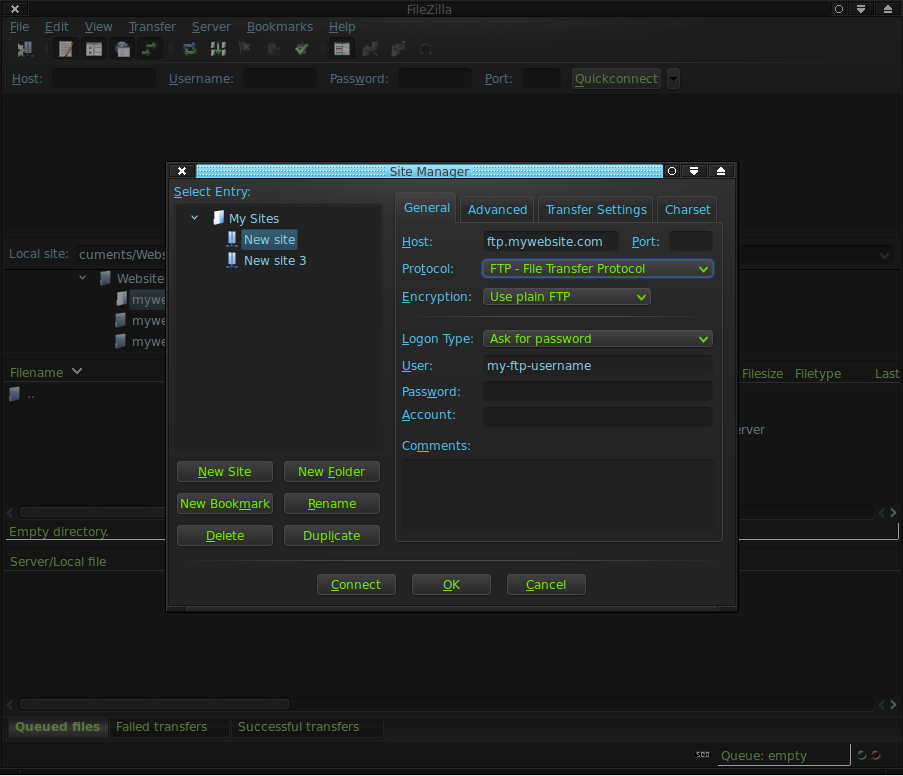
Most of the time regular FTP works although it is more secure to use SFTP or TLS (encryption is your friend) and sometimes it is required to use a certain protocol depending on your hosting provider or server. If you are using our CloudProxy Website Firewall be sure to use the hosting IP address of your website which can be found in your firewall dashboard.
Pro Tip: FTP uses port 21 and SFTP uses port 22 by default. Sometimes you have to mess around with your FTP credentials a bit to get them to work; If you have trouble I’d recommend speaking with your hosting provider and they should be able to help you out.
Ok, beauty! We’re in!
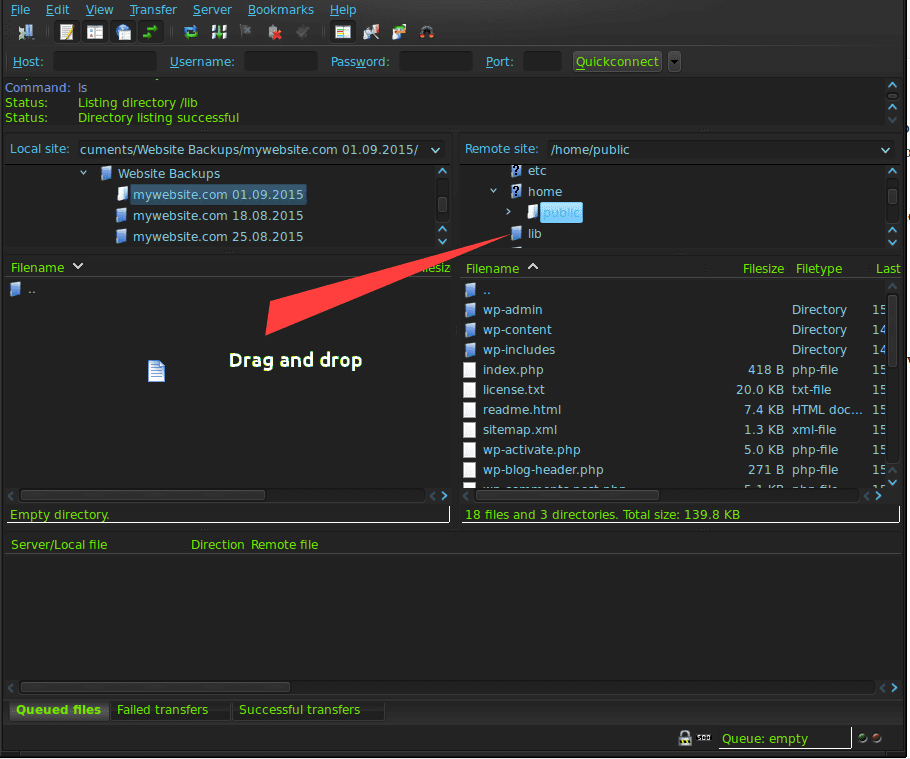
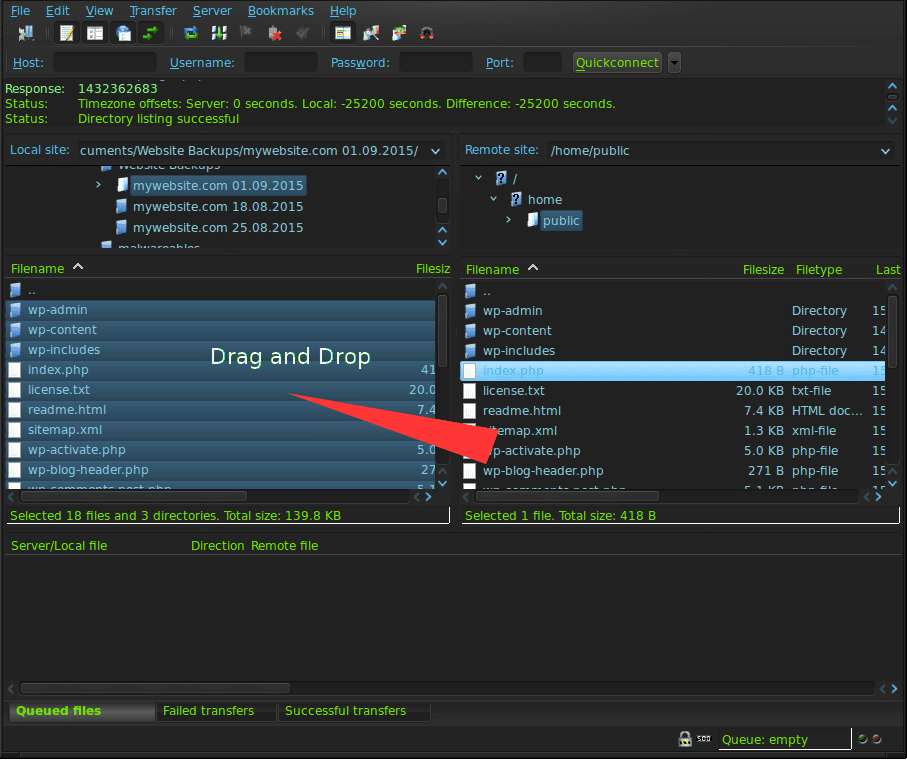
So on the left are the files on my computer and on the right are the website files on the server. Basically we just need to drag the server files over to our local computer. Don’t worry, they won’t be removed from the server! Just copied over.
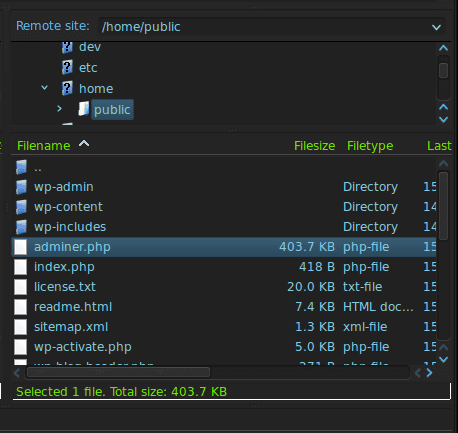
So first, find the public root of your site (in this case public but can also be called public_html, httpdocsor something similar) click it and drag it over to the folder on your computer you want to save it in.
Pro Tip: If you are using a caching plugin on your site, clear your cache before you backup your site. These files are meant to be routinely expunged and if you have cache files going all the way back to 2011 then you could potentially save yourself hours of time by doing this first.
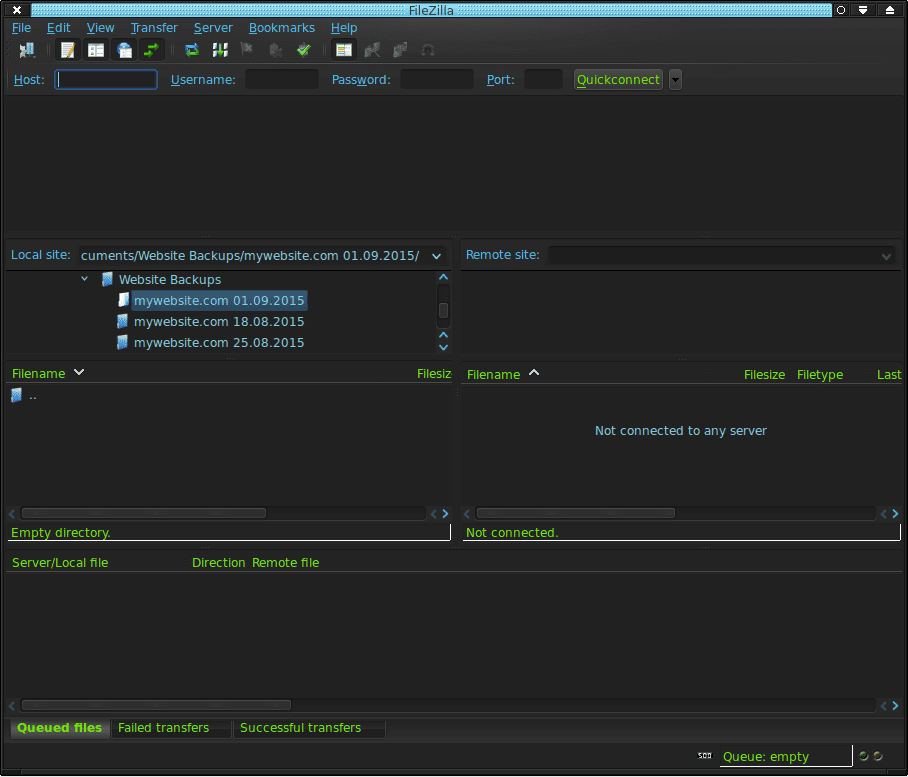
Here I have a handy little naming scheme for weekly backups (trust me, this is important):
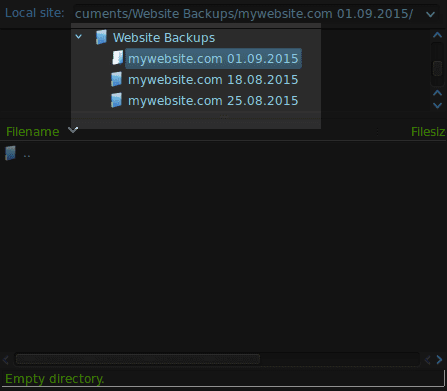
Useful naming convention for backups
Now the transfer begins. Put on some coffee because sometimes this can take a while, especially if you have a lot of photos or plugins on your site and even more-so if your website resides on a slow or grumpy server.
Filezilla should let you know once the transfer is complete. If not, the file transfer queue at the bottom of the program will be empty and no longer transferring files.
Now you’re all done with phase one!
Database
Ok now for the other half. What you’ll want to do is take that adminer.php file that you downloaded earlier and drag it over to the root of your website like so:
Pro tip: Be sure to delete adminer.php from the server when you are done. It’s best not to leave these tools around when not in use, otherwise it poses a security risk.
Now open up your browser and type in yourwebsite.com/adminer.php and you should see this:
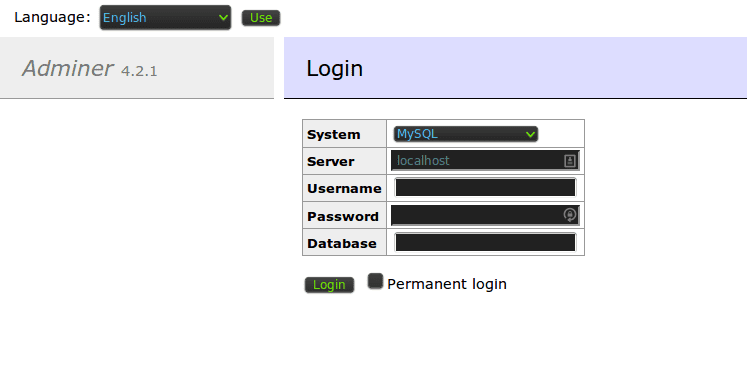
Now let’s log into the database. If you do not know your database credentials, open your website configuration file on your server in Filezilla. This would be wpconfig.php on WordPress, configuration.php on Joomla, and settings.php on Drupal. Right click the file and open it up with a text editor, and you’ll be able to find the login information Adminer needs.
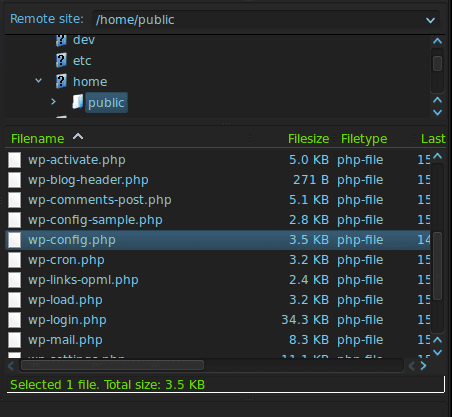
In WordPress, wpconfig.php stores database credentials.
Take those credentials and enter them into Adminer and you should get logged in:
Great! Now what we need to do is to export the database into a single file and download it to your computer. Click on the ‘Export’ button on the left hand side and you’ll be brought to the database dump panel:
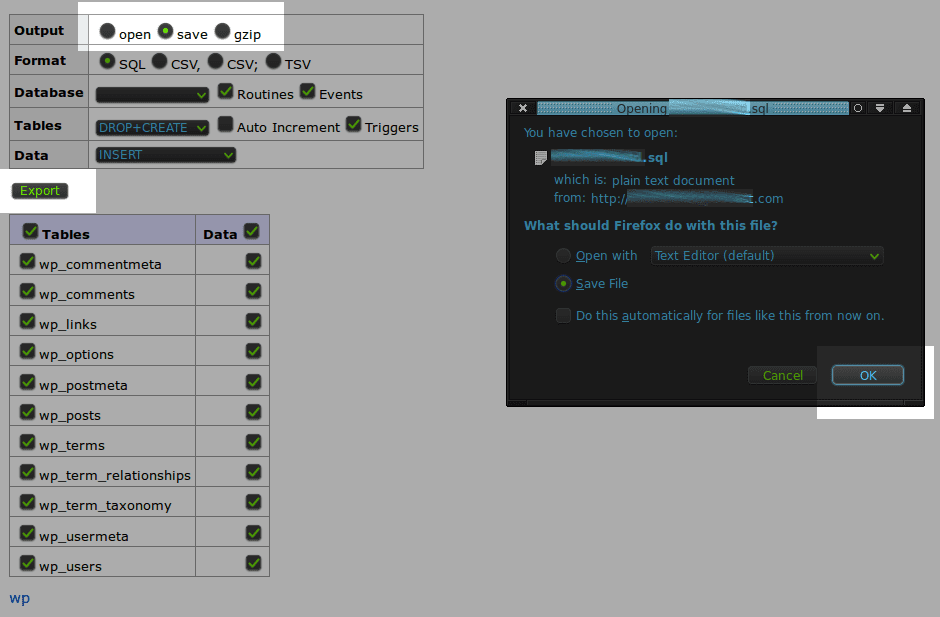
Make sure to select Save and then click on the Export button at the bottom. You will see a download prompt. Save it to the same location where your website files are. Usually this part only takes a few minutes and you should be good to go.
Some websites have large databases and this can take a while. Occasionally this can cause the server to time out. This is uncommon, but if you experience this then I would recommend that you download a copy of your database directly from your hosting account.
Once that is done then you are solid! All systems go. If you are going to continue to perform backups yourself make sure to do this somewhat often – I would recommend at least once a week.
If you’re interested in a service to automate this process for you then we have an affordable solution availablehere.
Backup Security
This tutorial just wouldn’t be complete without considering the importance of backup security.
It is imperative to store your backups in a secure location! Take measures to ensure that they aren’t accessed by those who shouldn’t or, worse yet, that they become the very thing that causes your site to be compromised to begin with. There is a lot of important information in these backups. Take your website configuration file, for example. The access to your database is sitting right there!
There is also a ton of outdated core files, themes and extensions contained within old backups. Out-of-date software is the leading cause of website infections! I see many websites that store their backups on their live server in directories like /old and /backup. This is very poor practice and renders your website vulnerable to all sorts of easily preventable attacks.
You can store your backups securely on your local computer, external backup drive or even a CD/DVD. Although not a necessary measure, in all cases it is best to encrypt and password protect your backups. This can help prevent them being misused if the files themselves are accessed by someone who shouldn’t have them. How you encrypt them will depend on the operating system you are using.
What If My Site Gets Hacked?
Sometimes websites are compromised when the computer used to administer the website is infected with malware. Keyloggers, trojans and other malware can scoop up FTP credentials or access the website backups you have stored on your machine. Be sure to frequently scan your computer for malware with a decent anti-virus program, regardless of what operating system you use.
It’s worth mentioning that you may be concerned that if your website is hacked and you are using your own computer to store those backups that you may end up downloading malware onto your machine. This is a legitimate concern! However, most of the time the malware that resides on websites is PHP based or written in some other server-side scripting language and wouldn’t execute on a desktop/laptop/tablet computer the same way that it would on a web server.
Nevertheless, it is important to employ effective security monitoring on your website to help prevent a site compromise to begin with. We offer a free WordPress security plugin, and our Sucuri AntiVirus plans include regular remote and server-side scans as well as protection from our Website Firewall.
If you download an infected backup, a full/thorough anti-virus scan of your computer with a decent anti-virus program will flag any dangerous files that may have been included with the hacked backup.
How to Restore
So let’s say you need to restore one of your older backups. Let’s say your site got hacked or your site is displaying a White Screen of Death (Internal Server Error) due to some botched update, misconfiguration or incompatible software. What do we do now?
Restore Files
Let’s say we have those website backups stored on my local computer like I showed earlier. What I’ll do is pretty much what we did before except in reverse. We’re going to drag the files from the backup we want to restore over to the public root directory of your site.
A prompt will display asking how you want Filezilla to treat these transfers. Since we want to replace the files on the server with the files on your local hard drive we are going to select Overwrite as well as Always use this Action and Apply to Current Queue Only. This will mean that during this transfer all the files will be replaced with the ones you backed up earlier.
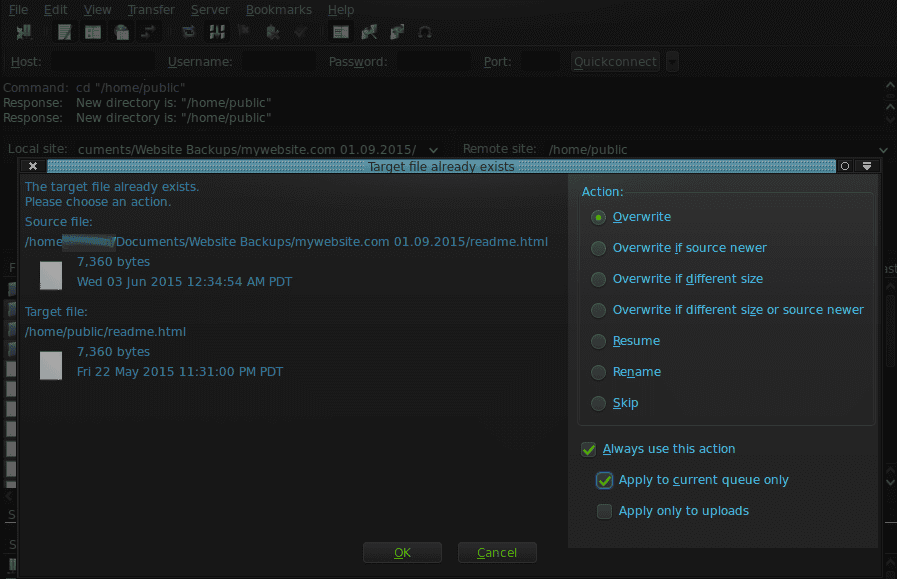
Let that run until the queue is empty and all files have been replaced and overwritten.
Restore Database
Now for the database!
Log back into Adminer using
the instructions from earlier on. You’ll need to re-upload the adminer.php file
to the server because you deleted it when you were done working with it,
right  ?
?
Now select the Import button on the left hand side. Now, click on the Browse button and select the database from your computer (or other storage medium) and select Execute. This will begin the database restore.
If your database is too large or it times out then you can try restoring your website database directly from your hosting account instead.
If all goes well you should see a confirmation that it was restored successfully. Hooray!
Backups For the Win
If you’re new to FTP and database management, and this all looks a bit foreign to you, then fear not! With some practice and patience you’ll get the hang of it and soon enough this will be easy.
The better equipped you are with using these tools the more effective of a website administrator you will be. Having an effective and secure backup solution is an often overlooked asset and – trust me – those files will be your best friend on a rainy day.
If you are interested in learning more about how to create an effective and secure backup strategy I’d recommend also checking out a blog post made by my colleague Keir.